Woohooo!!!! The Tumbling Blocks Weave Along is heeeeere and I’m so excited!!! Hopefully y’all have already snagged the free pattern and supplies and are ready to go.
To up the celebration at the Tumbling Blocks Weave fabric party, I’ll also be having a couple Instagram giveaways. The first will be a fat quarter bundle from the Heartland collection that I’ll announce on September 30th for those who participate. Simply post your progress and completion pictures using the hashtags #TumblingBlocksWeave & #MisterDomesticWAL and I’ll choose someone at random on September 30 @ 5:00 pm PST. Congrats to SouthBayBella!
I’ve also decided to extend the Weave Along until October 14th and will be weaving another Tumbling Blocks Weave starting October 2nd with another prize. So even if you’re just now considering, you still have time to join the party. Congrats to MandyAndyDesigns for winning the Meshworker’s Dream Package!!!
Next, gather these supplies:
- 20” x 20” piece of medium weight woven fusible interfacing
- 20” x 30” foam board
- Pins pins and more pins
- Sharpie marker (preferred)
- Masking tape
- Weaving tool
- That Purple Thang (preferred)
- 1” bias tape maker (optional)
- Thermal thimbles (optional)
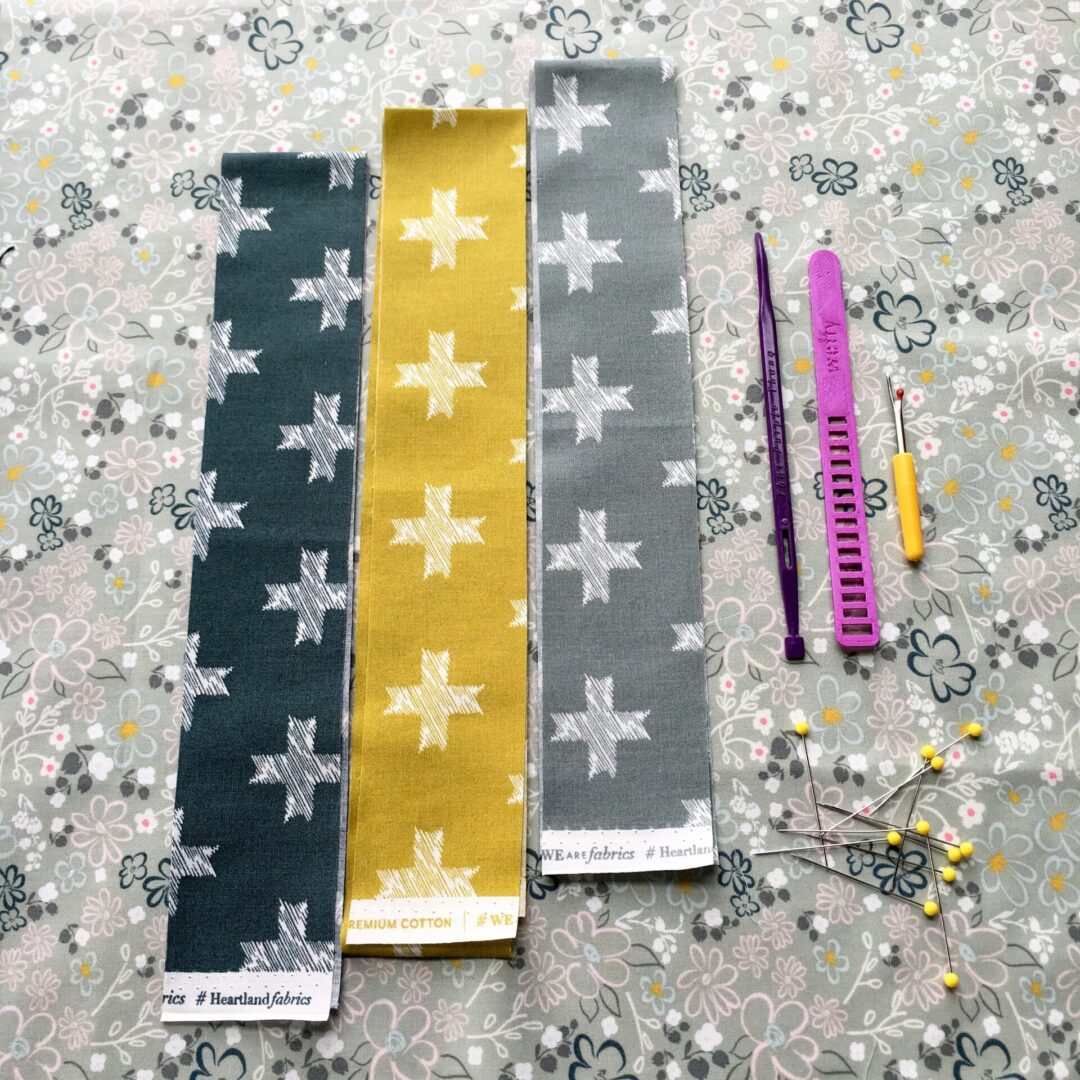
For the weave, you will need a 1/2 yard of three different fabrics. I am using the three Unn Cross prints from Pat Bravo‘s Heartland Collection.
DAY 1: Preparation
So today is all about preparation. Yaaaay! The fun part! First let’s prepare the board:
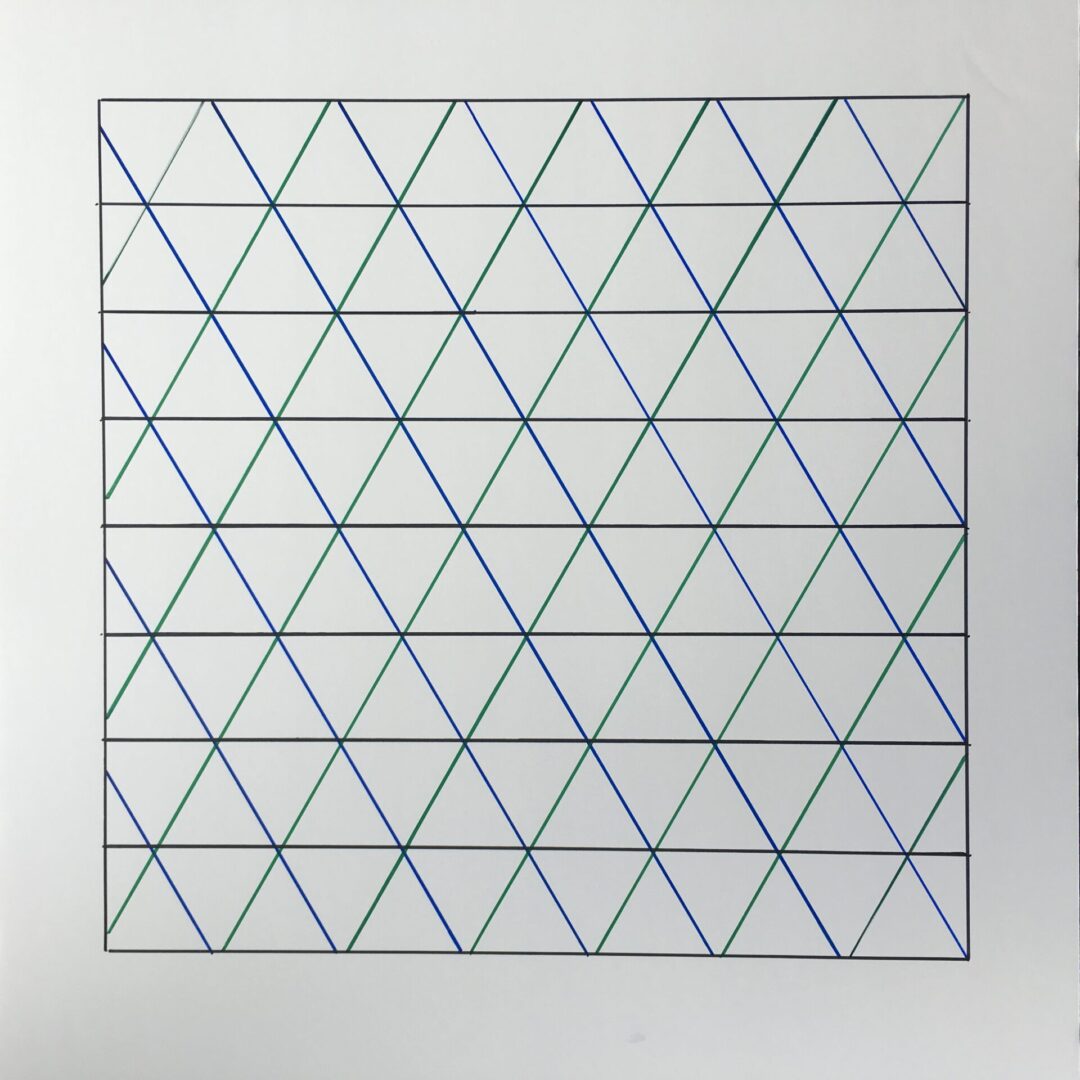
- Draw 16” x 16” square in center of board.
- Draw vertical lines every two inches from the bottom to the top of the square.
- Starting with either bottom corner, draw a line on a 30 degree angle going from the corner to the opposite side of the square. Draw parallel lines every two inches. If you do not have a 30 degree angle on your ruler, download this free printable ruler.
- Repeat Step 3 with opposite bottom corner.
- Lay 20” x 20” piece of fusible interfacing over the square with the textured side up. Pin each corner of the interfacing onto the board making sure the interfacing is taut.
Next, it’s time to cut the strips. All strips should be cut 2” width of fabric (WOF). Although you will have nine 2” strips, you will only need eight for the weave .
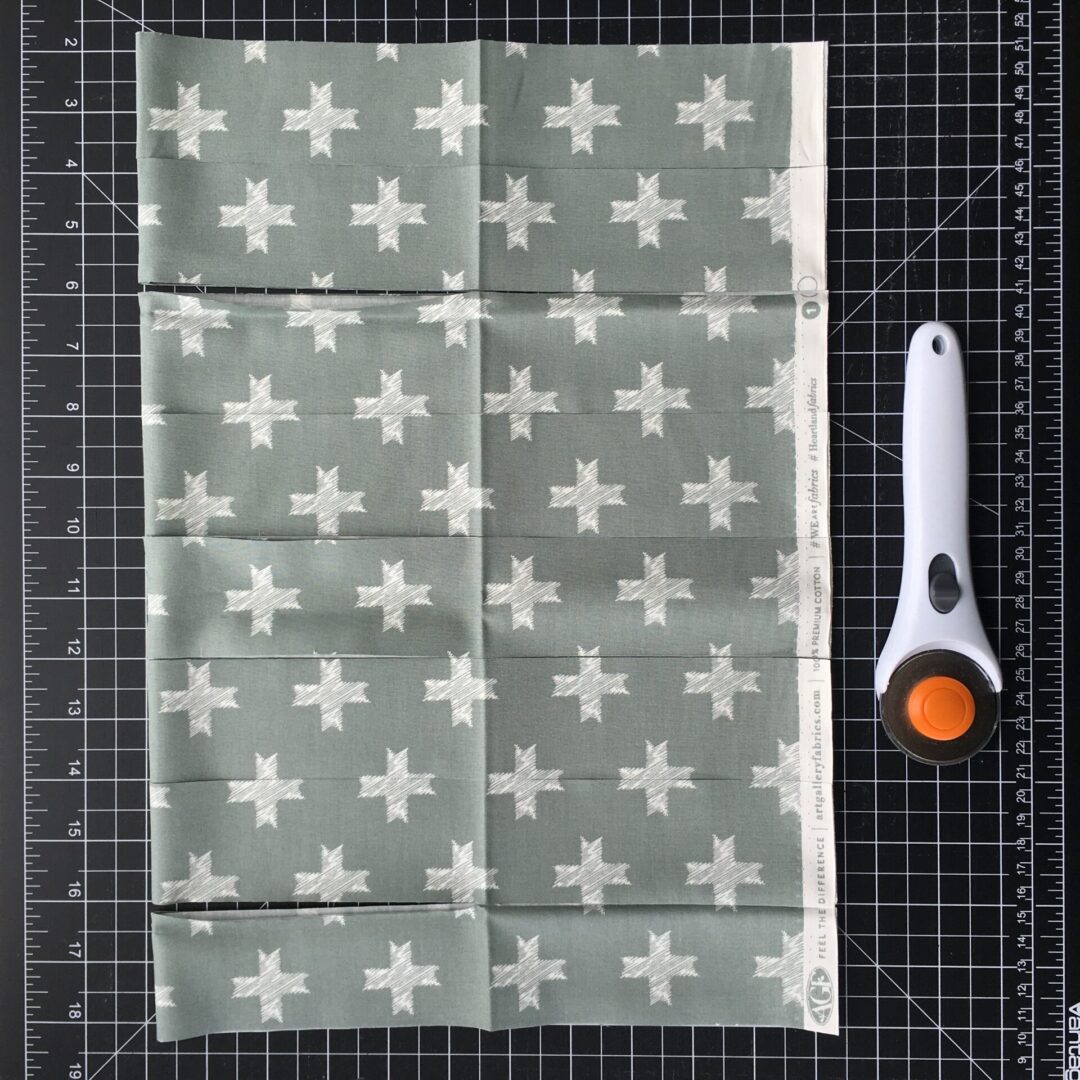
Okay so now it’s time to iron!!! Yaaaay! Everybody’s favorite part. Now honestly it doesn’t take that long and ironing WOF strips takes some sting out of it. Honestly, I love his part because I usually just put on some Beyoncé and go to my happy happy zen place.
There are two ways to prepare the strips:
- Fold the length of fabric toward the middle anduse steam iron (preferred method for this size)
- Use a 1” bias tape maker per instructions
I always do 1″ strips by hand because I just can’t get the 1″ bias tape maker to make consistent strips, but that might totally be user error, so have at it if you have one and keep going until all strips are done.
Cut List for Prepared Strips
- Fabric 1: 16 strips @ 22” (1/2 WOF)
- Fabric 2: 8 strips @ 22” & 4 WOF strips that you cut as you go
- Fabric 3: 8 strips @ 22” & 4 WOF strips that you cut as you go
DAY 2: The First Layer
Now that your strips are pressed and ready to go, the next step is all about pinning down the first layer onto the foam board. When discussing fabric weaving, the term layer describes each set of strips that go in the same direction.
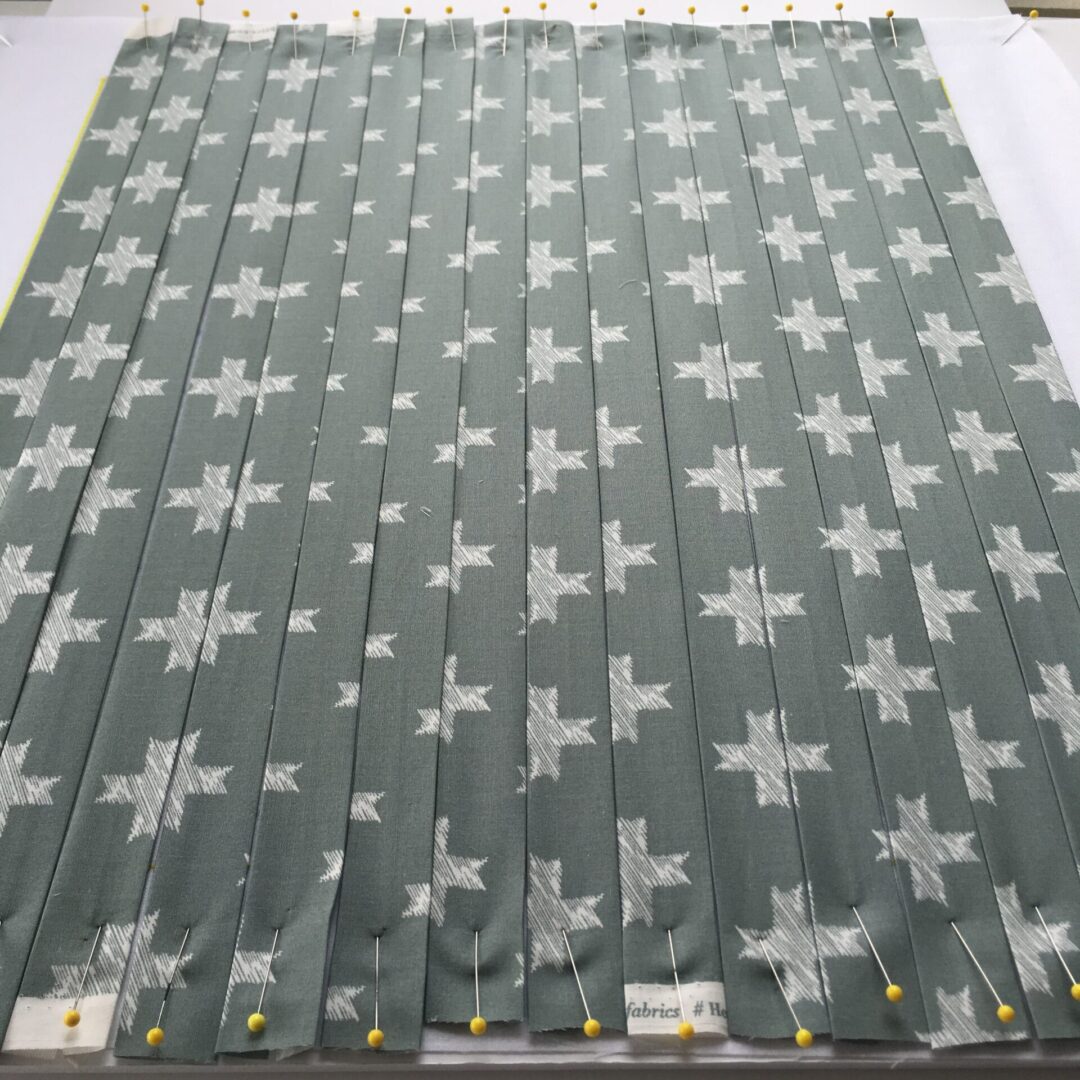
Starting with Fabric 1, lay each strip on the board, following the vertical lines. Since there is the possibility of slight variance in spacing with the drawn lines, it is more important for the strips to be as close as possible to one another than for two strips to fit exactly in between two lines.
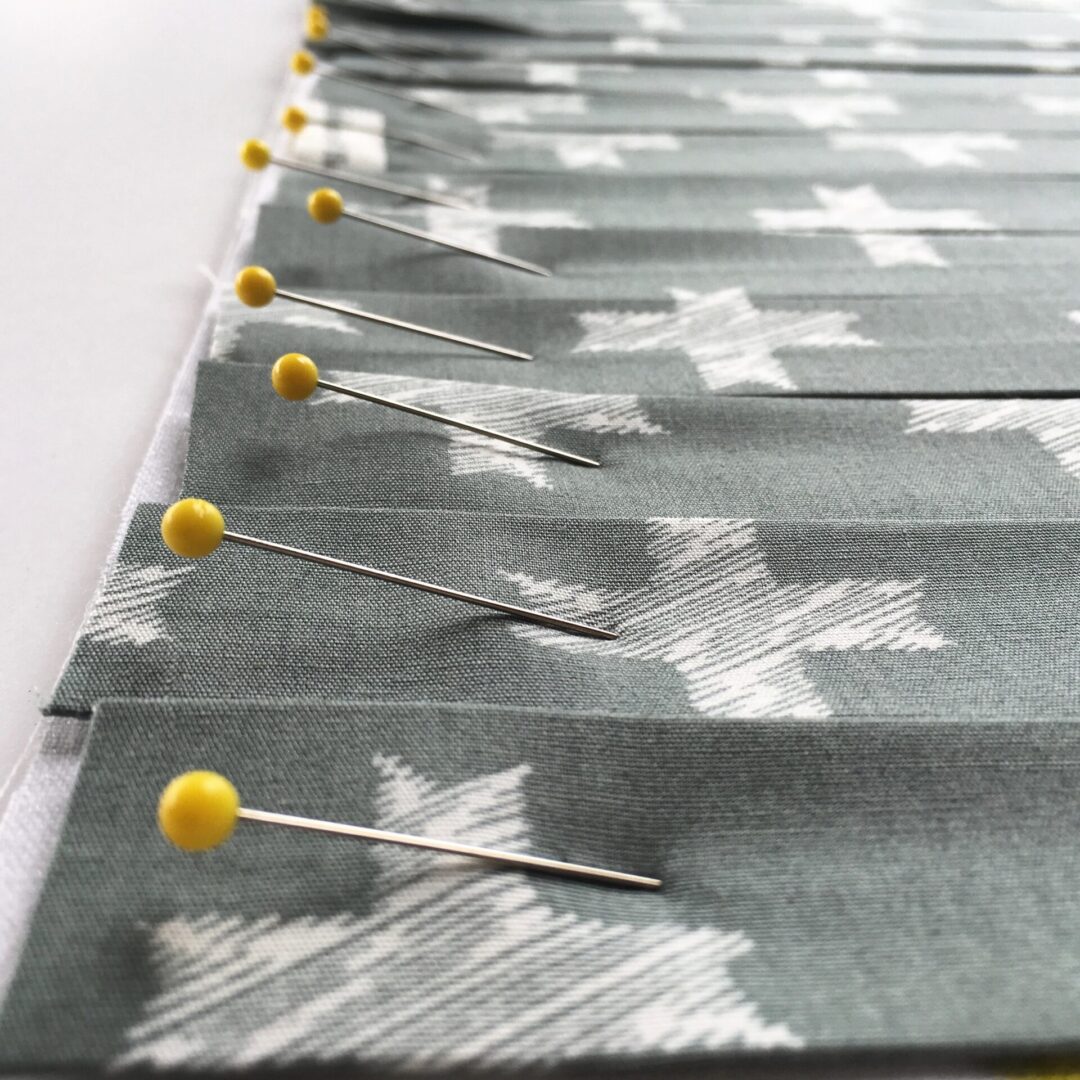
It is best if the pins enter the board at a sharp angle, with the pin heads facing the edge of the board. As you pin one side, try to pull each strip as taut as possible, stretching the fabric slightly beyond its natural state.
DAY 3: The Second Layer
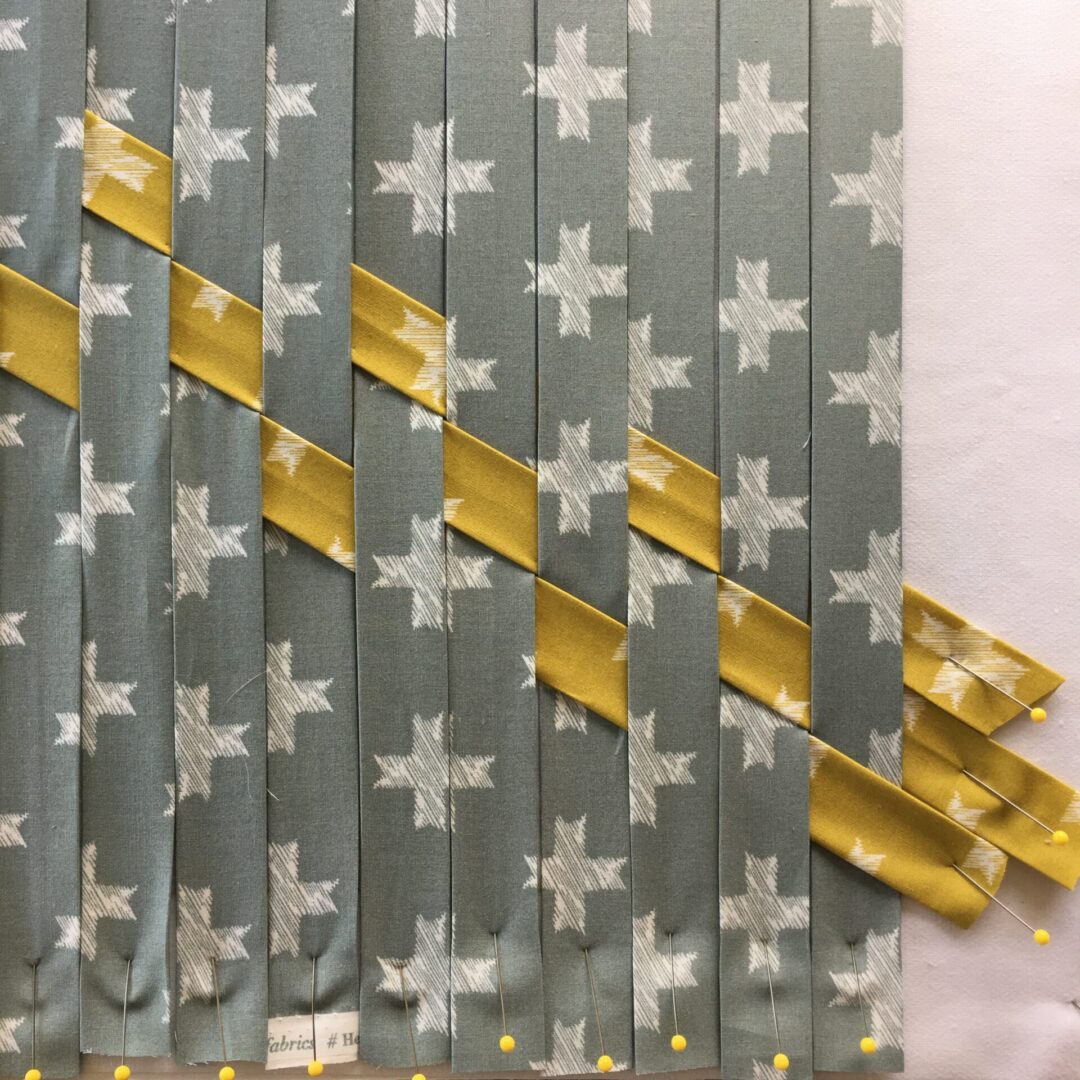
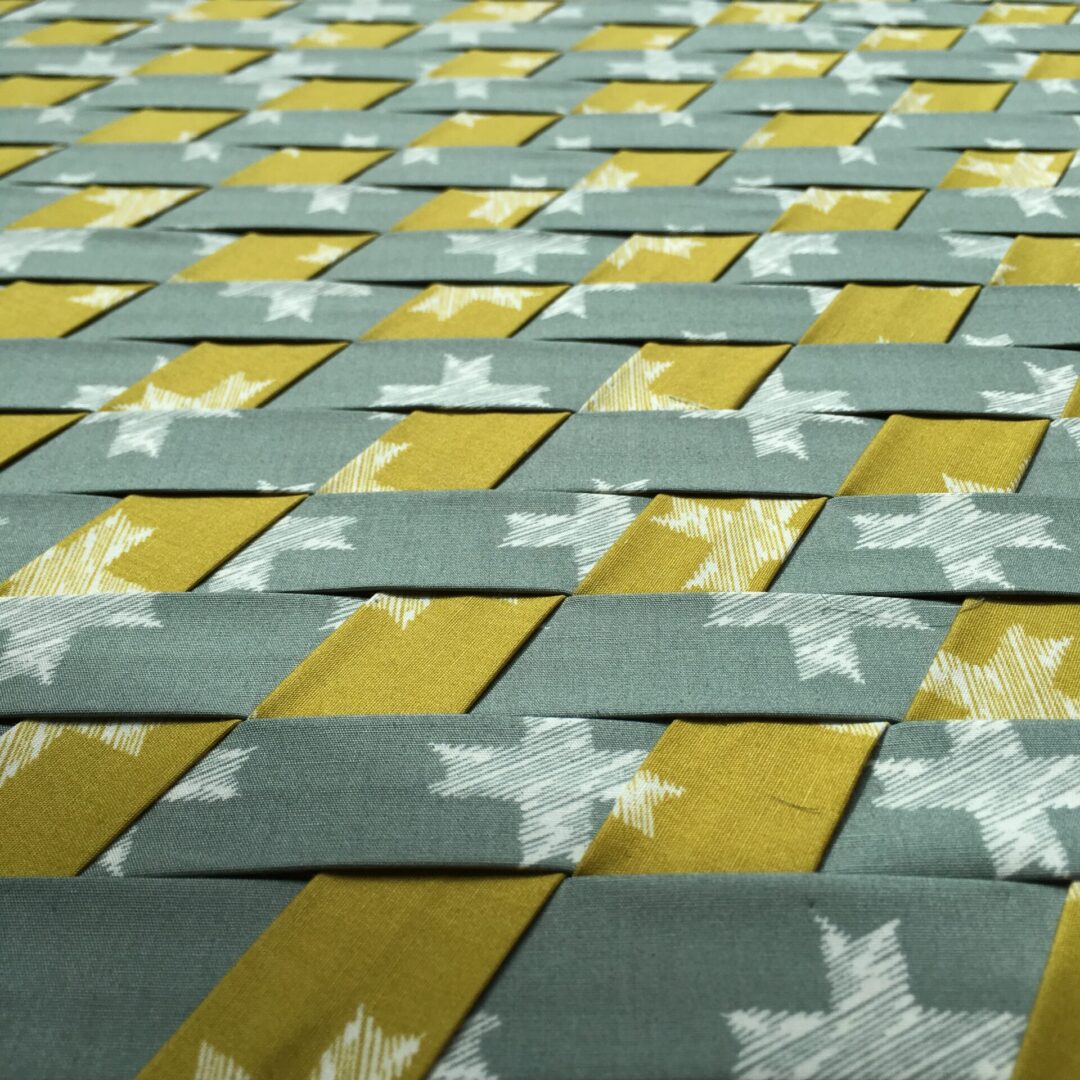
With Fabric 2, begin weaving at the bottom right corner following the 30 degree lines. All strips follow an over-1/ under-2 pattern, but have a sequence of three different starting points that repeats:
- Strip 1: Over-1 / Under 2
- Strip 2: Start at Under 1
- Strip 3: Start at Under 2
DAY 4: The Third Layer
Now it’s time to weave in Fabric 3. The first thing you need to do is identify the shape outlined in blue. You will be using your WEFTY to weave Fabric 3 under this shape at a 30 degree angle starting from the left and over the two vertical strips of only Fabric 1.
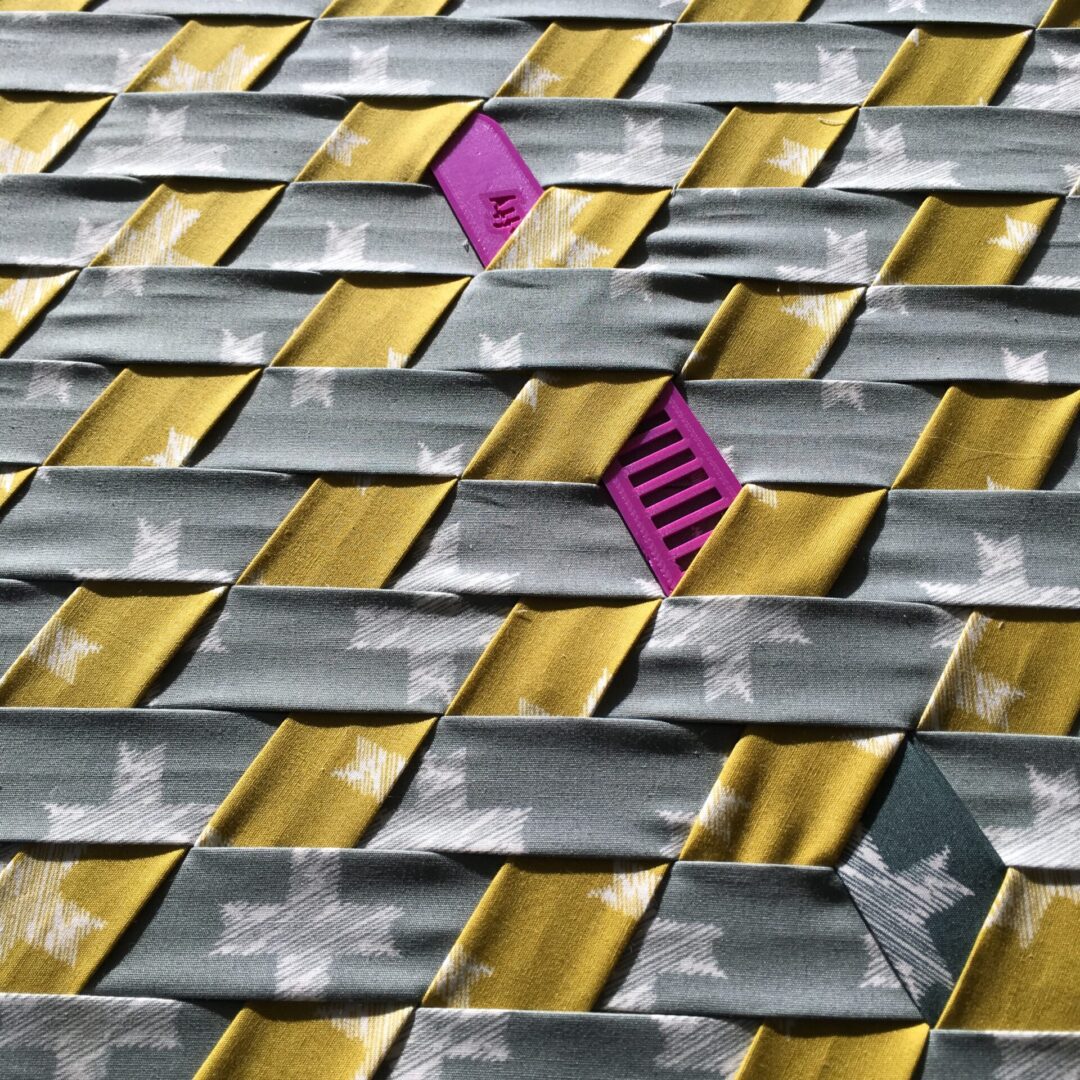
I also have found that inserting my PURPLE THANG into the exit of each under passage keeps the weaving tool from getting caught on the strips and allows for a smoother weave overall. If you feel resistance, do not push through. Instead, back up, adjust, and try again.
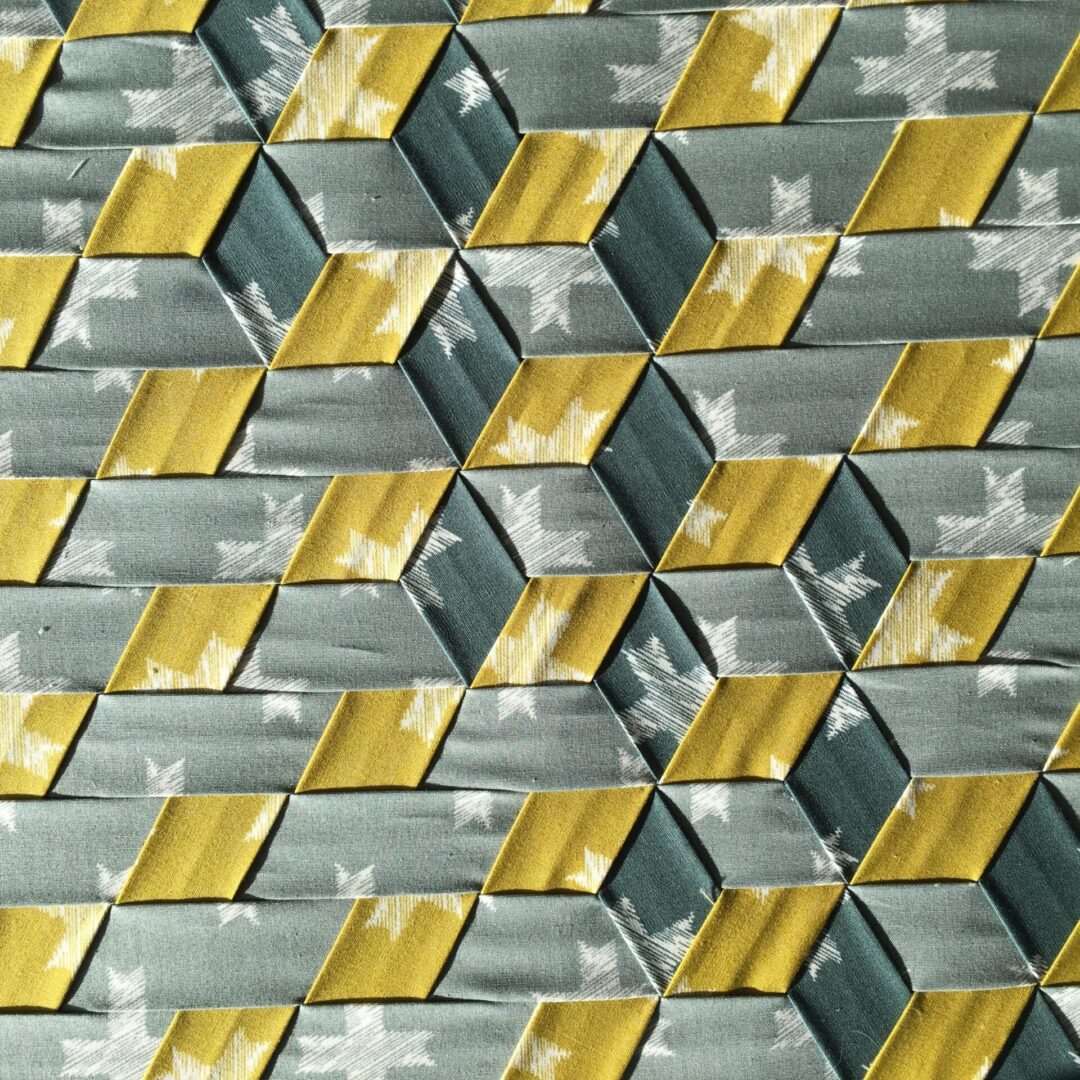
So keep doing this until the entire board is filled with awesome sauce tumbling Blocks!
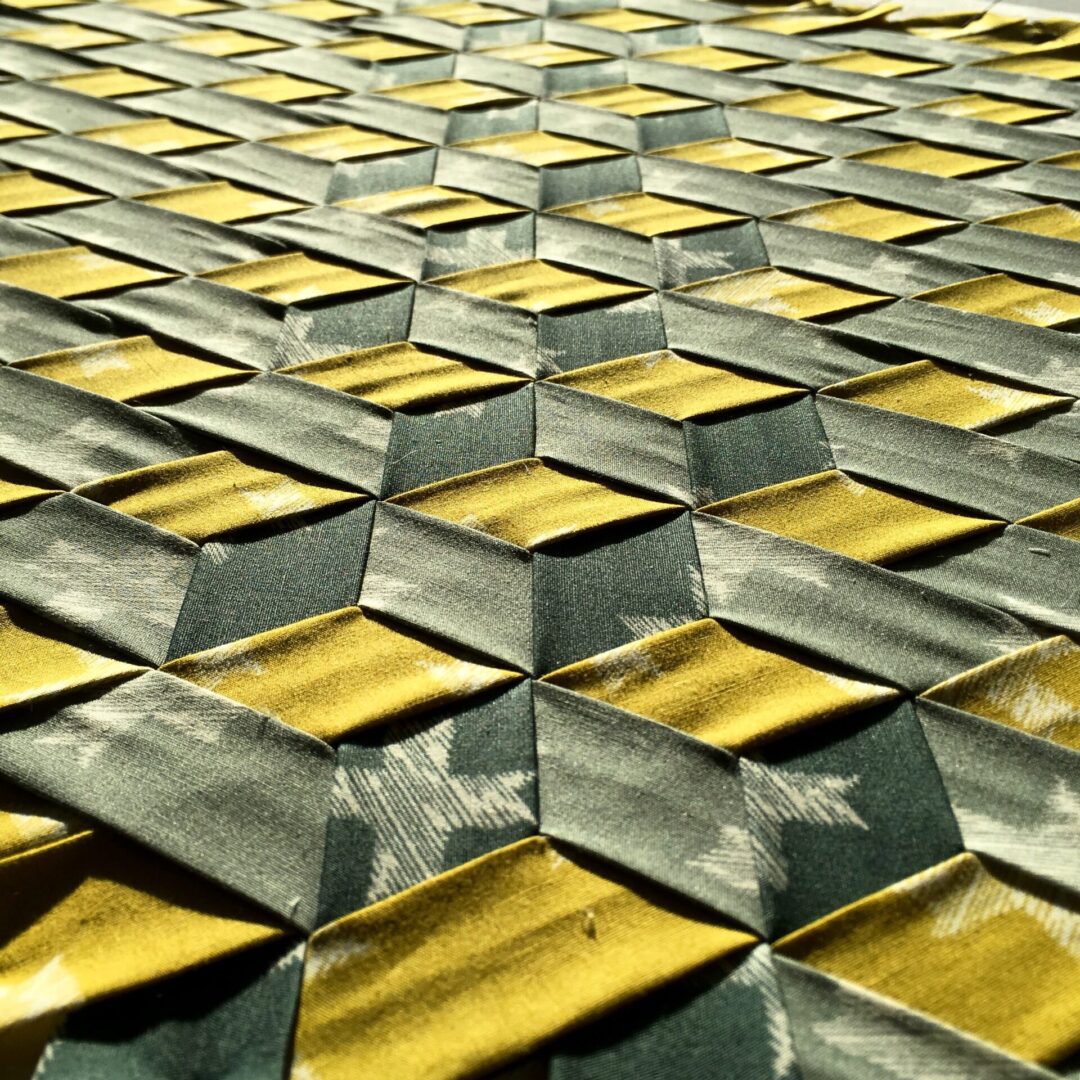
DAY 5: Securing the Weave
- First, use your steam iron on medium heat and press the top of the weave until set.
- Place masking tape on the perimeter of the panel and press firmly
- Unpin the panel. I know this is scary. Trust.
- Flip the panel over on an ironing board and iron on high heat.
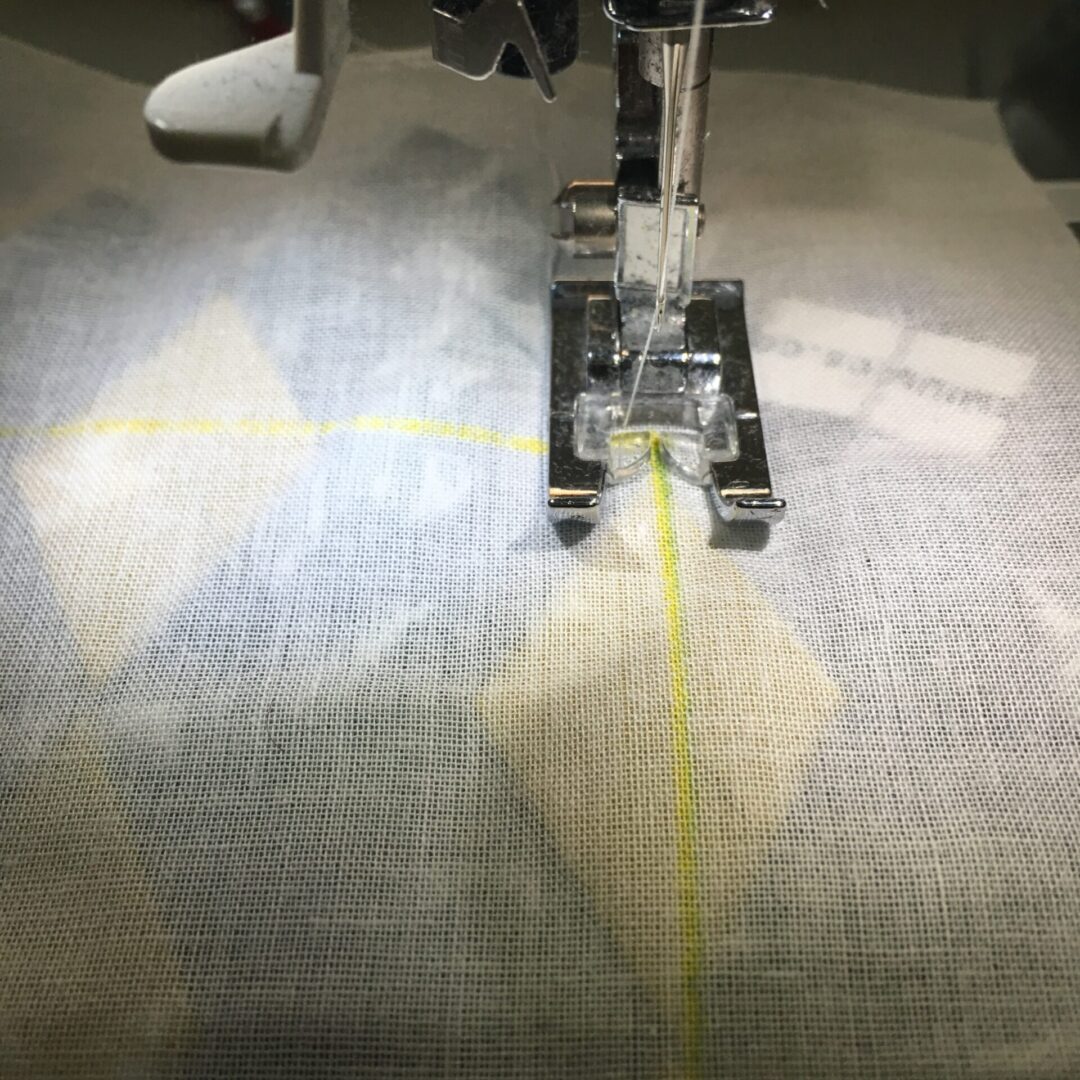
- With interfacing up, sew the outline of the square using a short stitch (1.4 – 1.6).
- Flip over and tear o the masking tape. The short stitch will allow for an easier tear.
- Cut 1/4” outside of outline and enjoy.
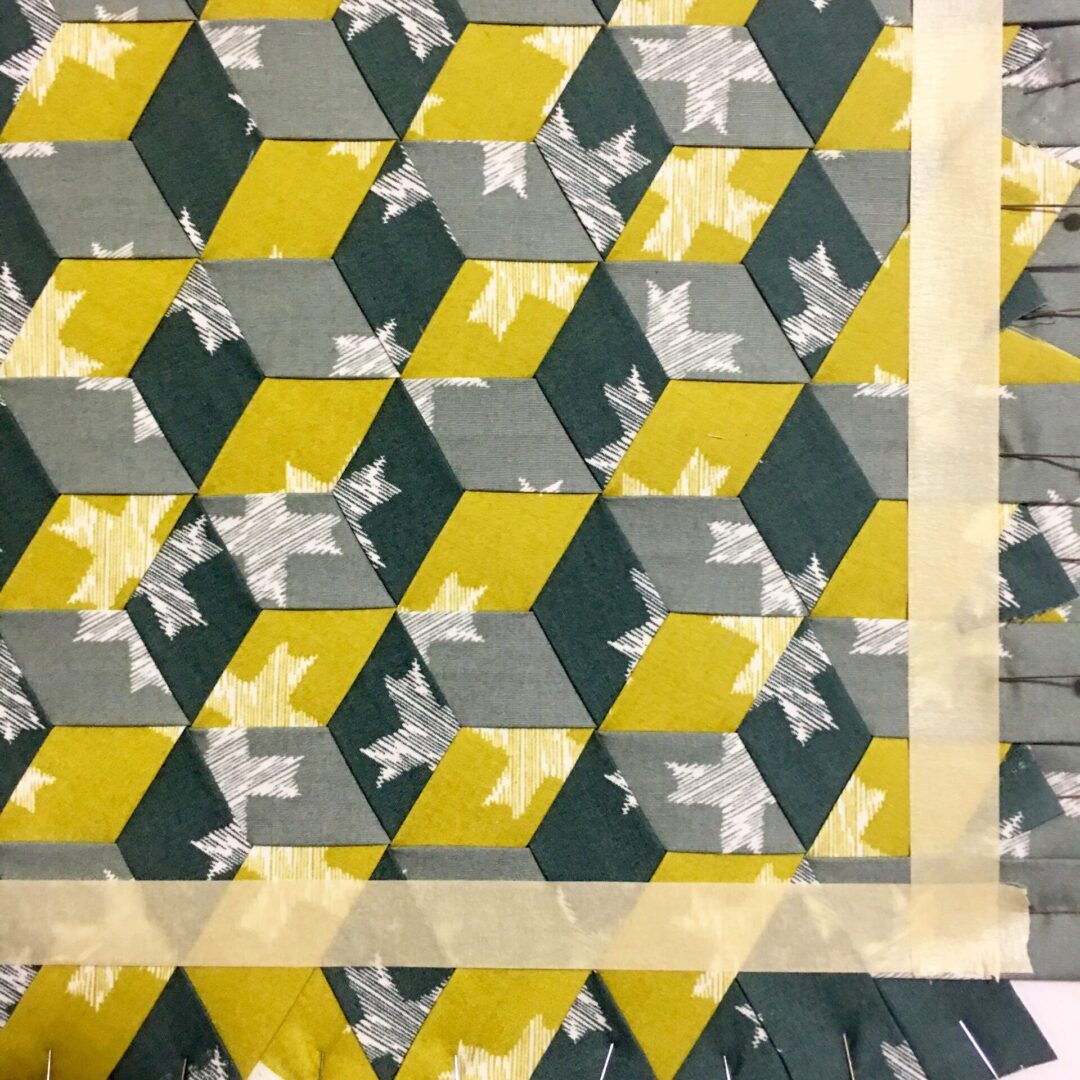
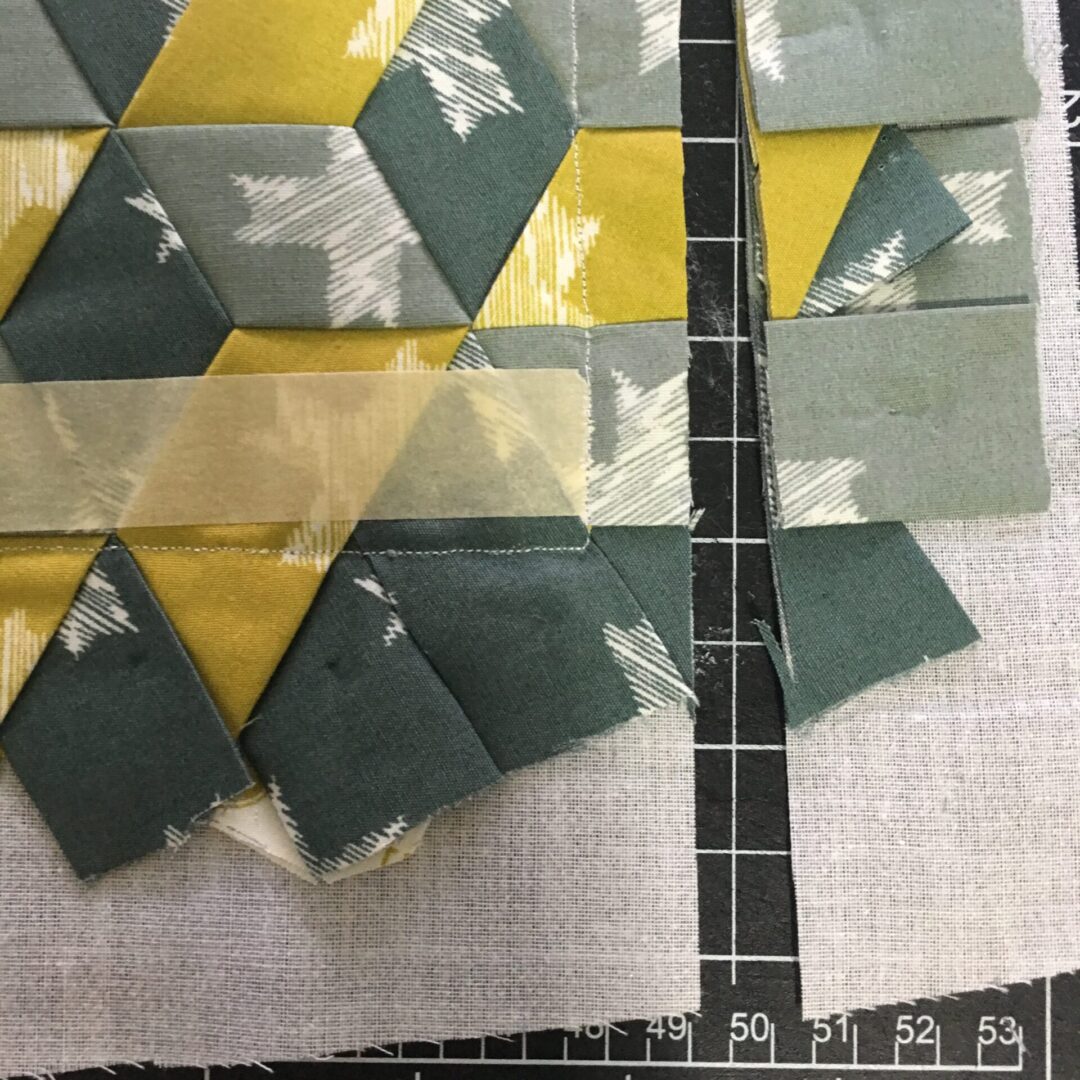
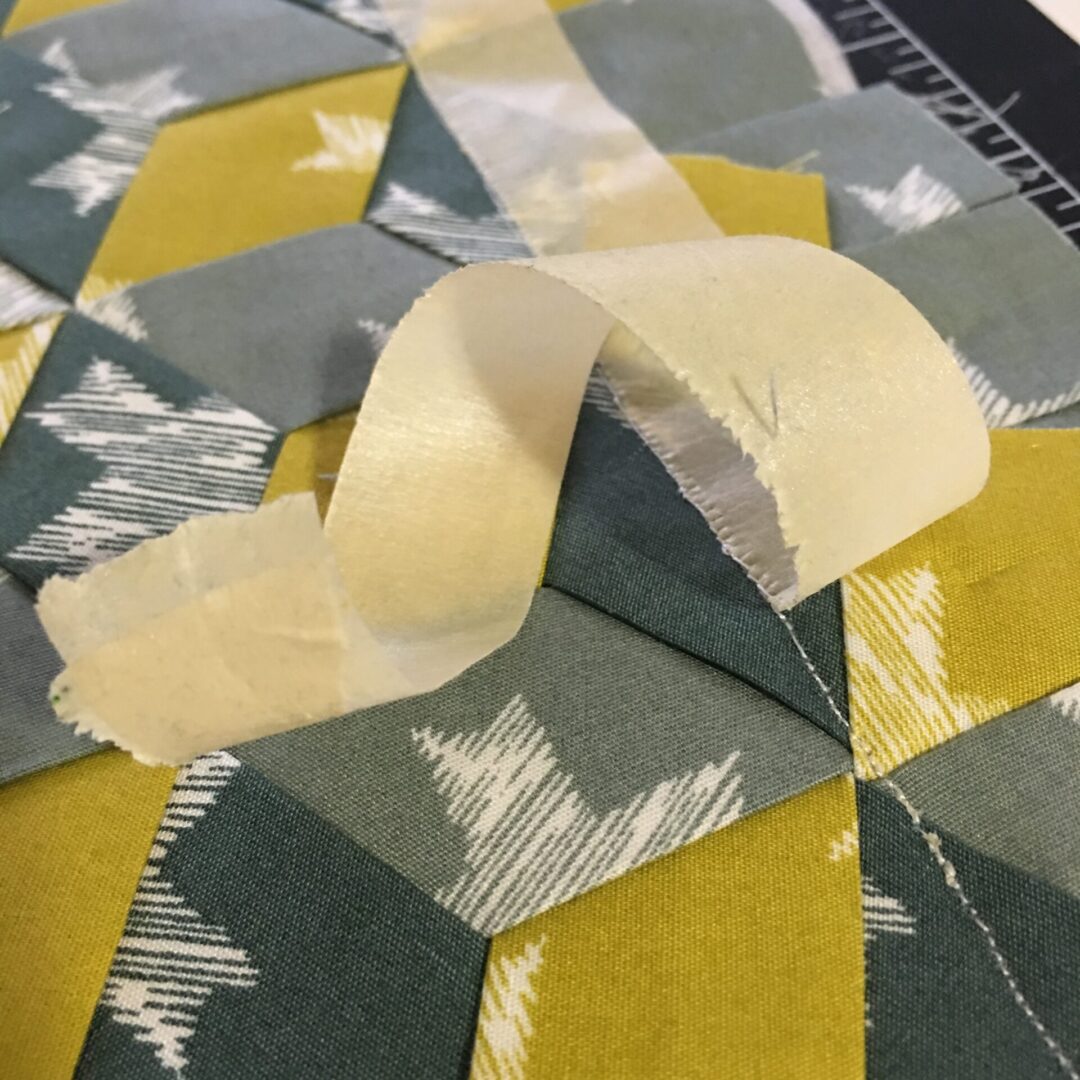
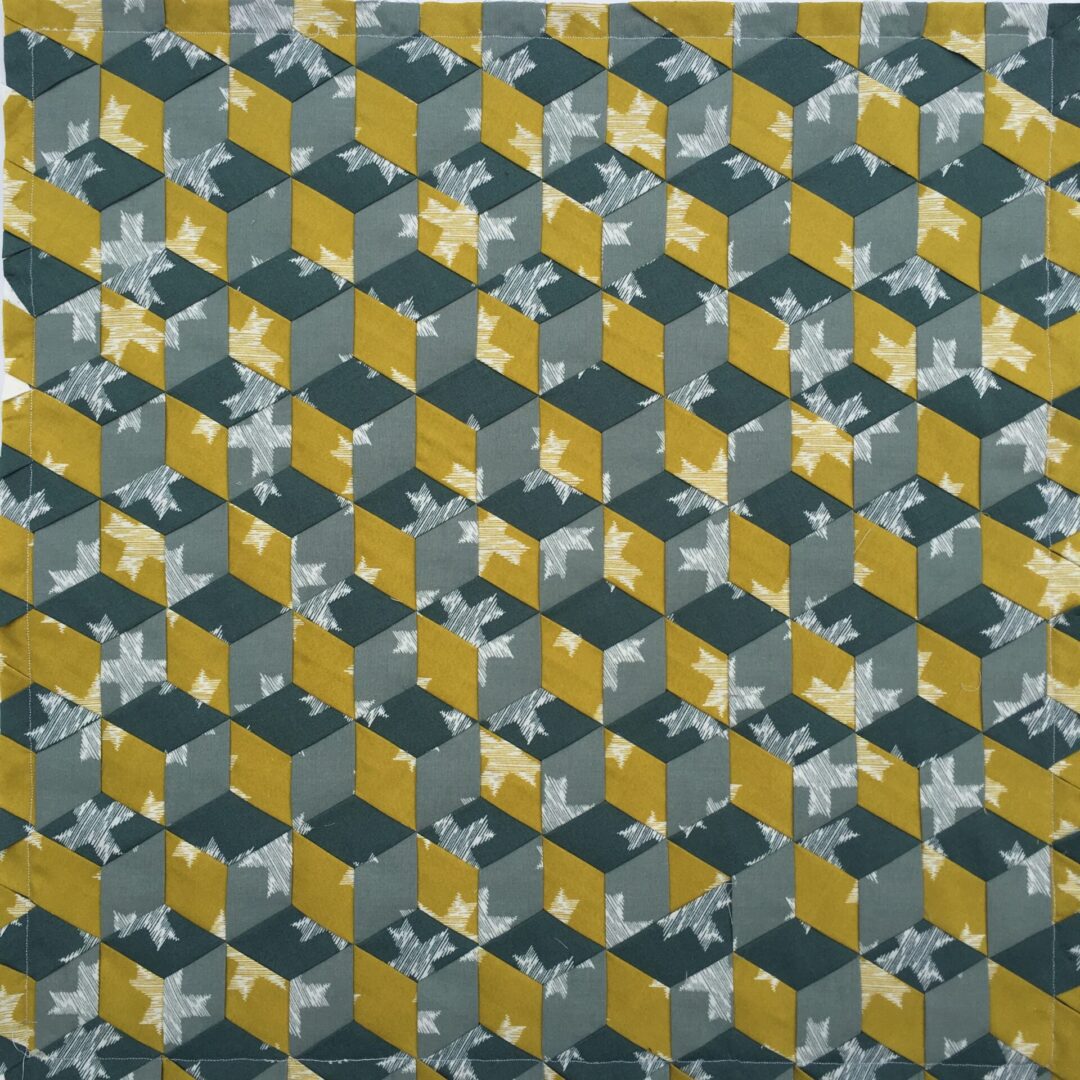
Now look at your woven panel and pat yourself on the back because you rock socks!!! And if you need to stare at it for a couple days, feel free because that’s always my next step!

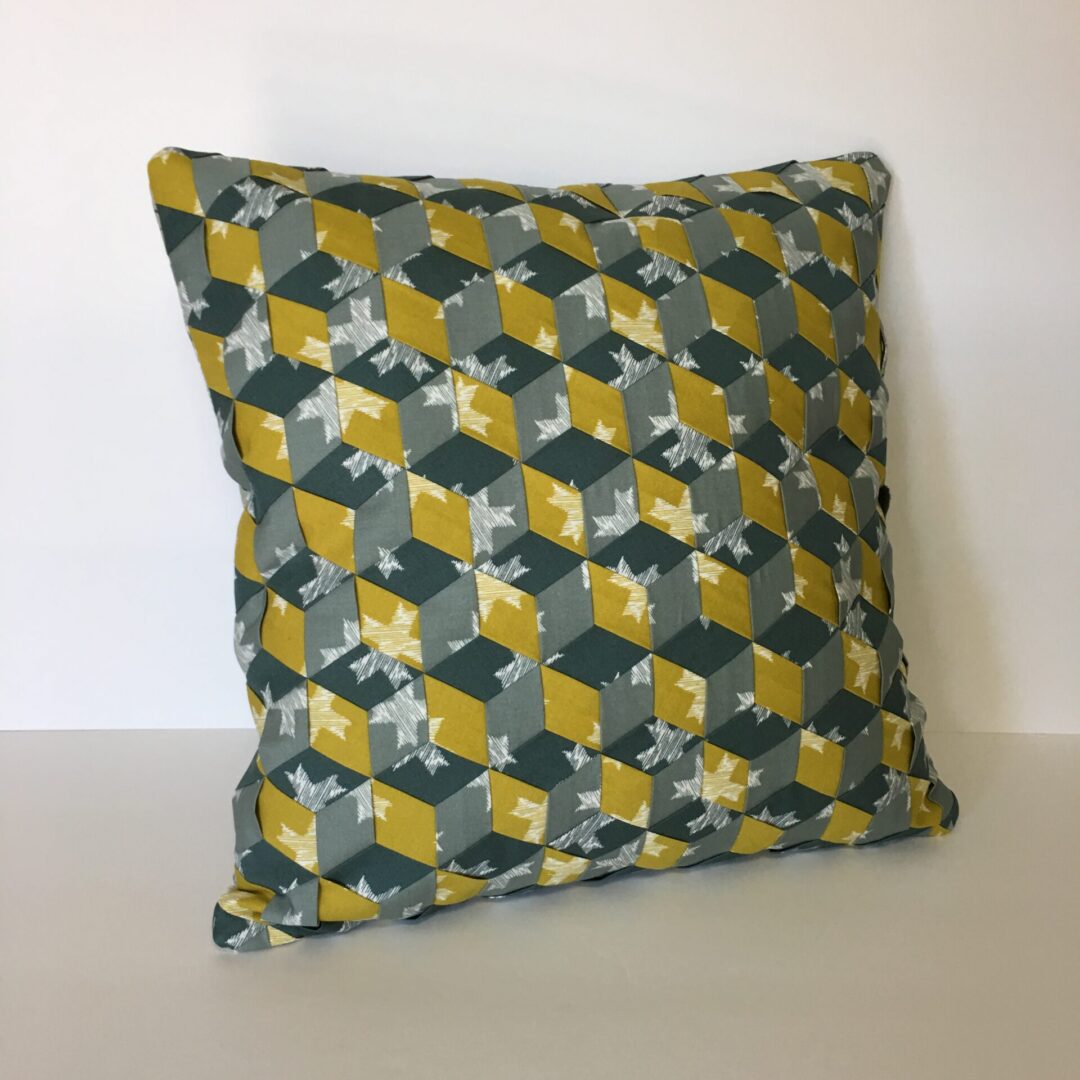
Yaaaaaay! Woop!

I really need to get in gear and do this NOW! Question for you: If I decide to work with 1″ strips (1/2″ woven) do I need to draw the lines closer together than 2″?
You can get away with still doing 2″, but 1″ would definitely help make the weave more precise with the smaller strips.
Thanks! Pulled my fabrics out at noon, and need to get the iron set up…. might be midnight before I can do that though! 🙂
That’s awesome!!! I’m so excited you’re joining the party!
Helllloooo, darling,
I’m so excited about this, and already I have questions! 🙂
Regarding the strips, what is the minimal length you need? I ask because one of the pretty things I want to use for this was already cut, so I have 37″ instead of whatever it usually is. Will that do? Say yessssssss please!
Thank you!
Manuela
Heeeey!!! So on both diagonals, there are 8 strips that need to be at least 20″ but that’ll give you little wiggle room. If you have enough to make like 10 strips instead of 8 for fabrics 2 & 3, you should be fine.
Wonderful, then I’m good! Yay!
I’m so in. But my husband has banned me from ordering new craft supplies, haha. I’ve snuck in some interfacing and the purple thing, and will be pulling fabrics from my stash, but going to be super improvv-ing on some things. That will add to the fun, right?
Haha Belinda! I totally get that! and yes, the making it work part of fabric fun is often my most favoritist part! ?
Does it matter which fabric is fabric #1? For example I have one solid and two print fabrics. does it matter if I lay my solid down as the first layer or won’t make a difference in the final appearance?
Howdy Priscilla! It totally doesn’t matter which one goes first unless you’re wanting the blocks to look a certain way. If that is the case, fabric 1 is the right side of the block, fabric 2 is the left side of the block, and fabric 3 is the top of the block.
Awesome, Matthew! Have my board all ready, just waiting for my fabrics. Gonna make me a handbag with the weave. #treatmyself!!
Hey, Matthew!
I have a leftover piece of foam board 20×20. Will that work? I also can’t ‘see’ how to start drawing the 30 degree angles. Where do I place the ruler?
Also yes the 20 x 20 is perfect
Hey, Matthew!
I have a leftover piece of foam board 20×20. Will that work? I also can’t ‘see’ how to start drawing the 30 degree angles. Where do I place the ruler? THANKS!
Howdy Roxanne! Great question. I added a picture in the blog post when drawing the grid on where the first position the printable ruler. Hope this helps.
Yay! I can see it now!!! Thanks!
I see your beautiful photo has 16 strips- it that just for illustration purposes or did I miss something and we have to cut our strips half of WOF.
Howdy Lori! Which photo are you referring to? If it’s the one with only layer one, yes it’s 16 strips vertical. The cut list is on page 3 of the pattern. Here you go just in case:
Cut List for Prepared Strips Fabric 1: 16 strips @ 22” (1/2 WOF)
Fabric 2: 8 strips @ 22”, cut as you go with 4 WOF strips
Fabric 3: 8 strips @ 22”, cut as you go with 4 WOF strips
Thank you
I am to excited. I have been in AZ visiting my son. I ordered my wefty today. I have everything else. Starting tomorrow. ???
Ordered my wefty…home from visiting my son….have all supplies …..I guess that means I start tomorrow…..YES‼️???
I’m freaking out mixed with omg-excitedness. The third step seems to have some magic in it that maybe I’m not getting. I am having a hard time figuring out where it inserts and where it goes over. I will try a bit more to see if I’ve got it.
Hey Kelly! I totally get that! Did you see the video tutorial on step 3 that o posted on Instagram? Here’s a link just in case: https://instagram.com/p/BKrCebWhwzo/
OMG, how did I miss that?! THAT is the magic I was missing! Now I am covered in weaving magic! Thank you.
Sometimes I have problems identifying at the beginning to see where and how just to start. I think I will need to make a few more weaves, just to get it down!
Yaaay! So glad it helped. Blame it on the algorithm or whatever.?
Just a question. Can the weaving be washed? I see you put some of this on garments. Since the raw edges are folded under, won’t they “come out” in the wash?? Also, have you tried stitching over a completed weave ?
Hey Cheryl, I wouldn’t put it in the washing machine unless it’s been quilted. I’ve only ever stitched in the ditch, but a lot of people in the Weave Along have quilted over the weave and it’s gorgeous.
I am over the moon to find your tutorial! I’ve seen yours and Tara’s work on IG and have just recieved my Wefty tool, I can’t wait to get going! Thanks for the inspiring kick I needed!
Hey Matthew! I’m FINALLY going to jump off the diving board with this weave. I know I’m lame, it’s only taken me six months or more, and changed my fabric and project about three times, but this time ITS FOR REAL! I want to make the top of seat cushions for two kitchen stools. I’ve got my fabric and almost ready to cut into it ….. then wondered ….. do you prewash your fabric? I generally don’t do that unless it is apparel fabric and I’m afraid it will shrink. But I’m wondering seat cushions …. hmmm …. what’s your advice?
“Hello very nice site!! Man .. Excellent .. Wonderful .. I will bookmark your site and
take the feeds additionally? I am glad to find numerous useful information here within the post, we’d like work out more techniques in this regard,
thanks for sharing. . . . . .”